2.4. Introducing PyCharm#
If you have a large amount of Python code, using an Integrated Development Environment (IDE) could be more beneficial. An IDE is a tool that enables programmers to write code productively by combining different tools and resources that are commonly used when writing code, into one application. Below are instructions on how to create Jupyter Notebooks in PyCharm. There are several other popular tools used to code Python. We will be using PyCharm as it is one of the most popular tools used to develop Python code (the top one according to the Python Software Foundation survey). It is a tool used not just in academia but also in industry by small to big companies.
2.4.1. Creating a Project in PyCharm#
Before writing code in Python, we need to create a project in PyCharm. A project allows you to keep track of the files and environment associated to your code.
PyCharm
In PyCharm’s Welcome screen, click New Project.
Choose Pure Python to create a Python project. Choose the location of the project in the Location field.
Name your projectmyFirstProject.Choose Conda in the New environment using field as shown below.
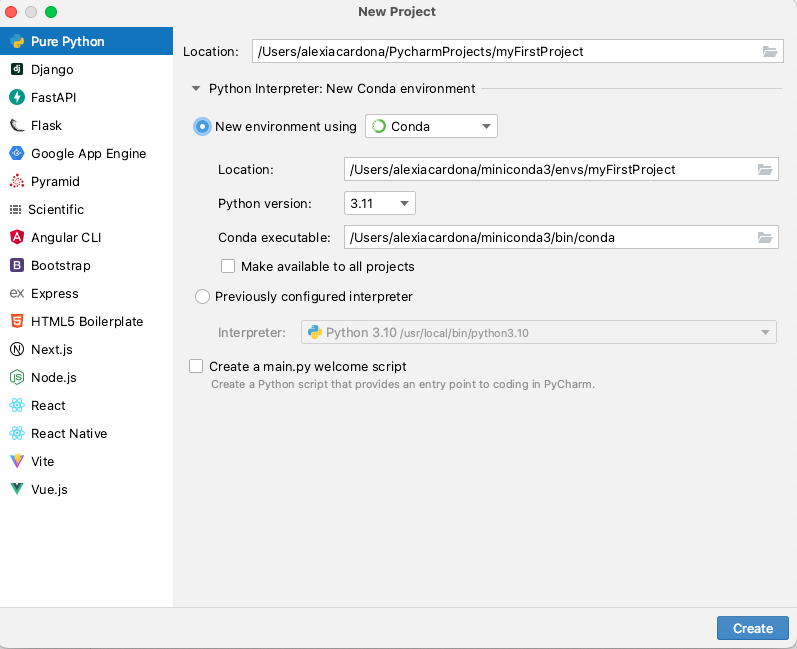
Now click the Create button to create the project.
2.4.2. Creating Jupyter Notebooks in PyCharm#
Now let us get started and see how we can create Jupyter Notebooks in PyCharm.
To create a new Jupyter Notebook:
Select File|New|Jupyter Notebook from PyCharm’s main menu.
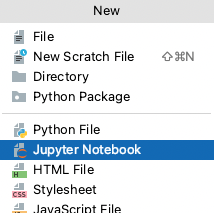
Enter
notebook1as the name your new Jupyter Notebook.
The Jupyter Notebook is now displayed in PyCharm. If this is your first time creating a Jupyter Notebook in PyCharm, most likely you will get a message at the top of Jupyter Notebook file saying that “Jupyter is not installed”. If so, click on the Install Jupyter link on the right hand side. This will install the package
Jupyter. When this is installed, you would be able to add content to your Jupyter Notebook file.
Exercise 2.5 (Creating Notebooks in PyCharm)
Level:
Edit notebook1 and write the code shown in Fig. 2.3, and execute it in a Jupyter Notebook.